How to Make a Cast of Your Breasts
Making a cast of your breasts can be an emotional experience, especially if you are shortly going to have breast surgery such as a mastectomy.
Some women choose to cast their breasts for fun and others for a more personal reason. Whatever your reason, and even if tears may be shed, we would love to encourage you to have some fun whilst making your artwork.

In order to complete your cast you will need a minimum of two people so this could be a mother and daughter, a partner or spouse or perhaps you wish to do this as a group, however, you choose to partake we just hope you enjoy making your breast cast as much as we enjoyed making ours.
Casting your breasts is not difficult, although we recommend you take your time to perfect your cast. There is no need to rush, simply enjoy creating this unique personal piece of art.
Items you will need to purchase:
Plaster moulding strips (cut into x3 strips)
A pot of petroleum jelly
Fine sandpaper
Plaster of Paris
Paint, jewels, and varnish
All the above can be purchased in your local craft shop, such as Hobby Craft.
Other items you will need:
Scissors.
2 medium-sized mixing bowls (old ones that can be thrown away).
1 jug of water.
1 small paintbrush.
An old towel to cover your waste.
An old sheet to cover the floor.
1 old tray or thick piece of cardboard.
Please watch the below instruction video before completing your cast:
Steps to creating your breast cast:
Stage 1
Measure out your strips in advance.
Cut x 4, 2 x 5-inch strips for the nipple areas (NOTE: make these slightly longer the larger your breasts)
Cut the remaining strips as per the video. Please ensure you measure your torso in advance to ensure the right length strips are cut.
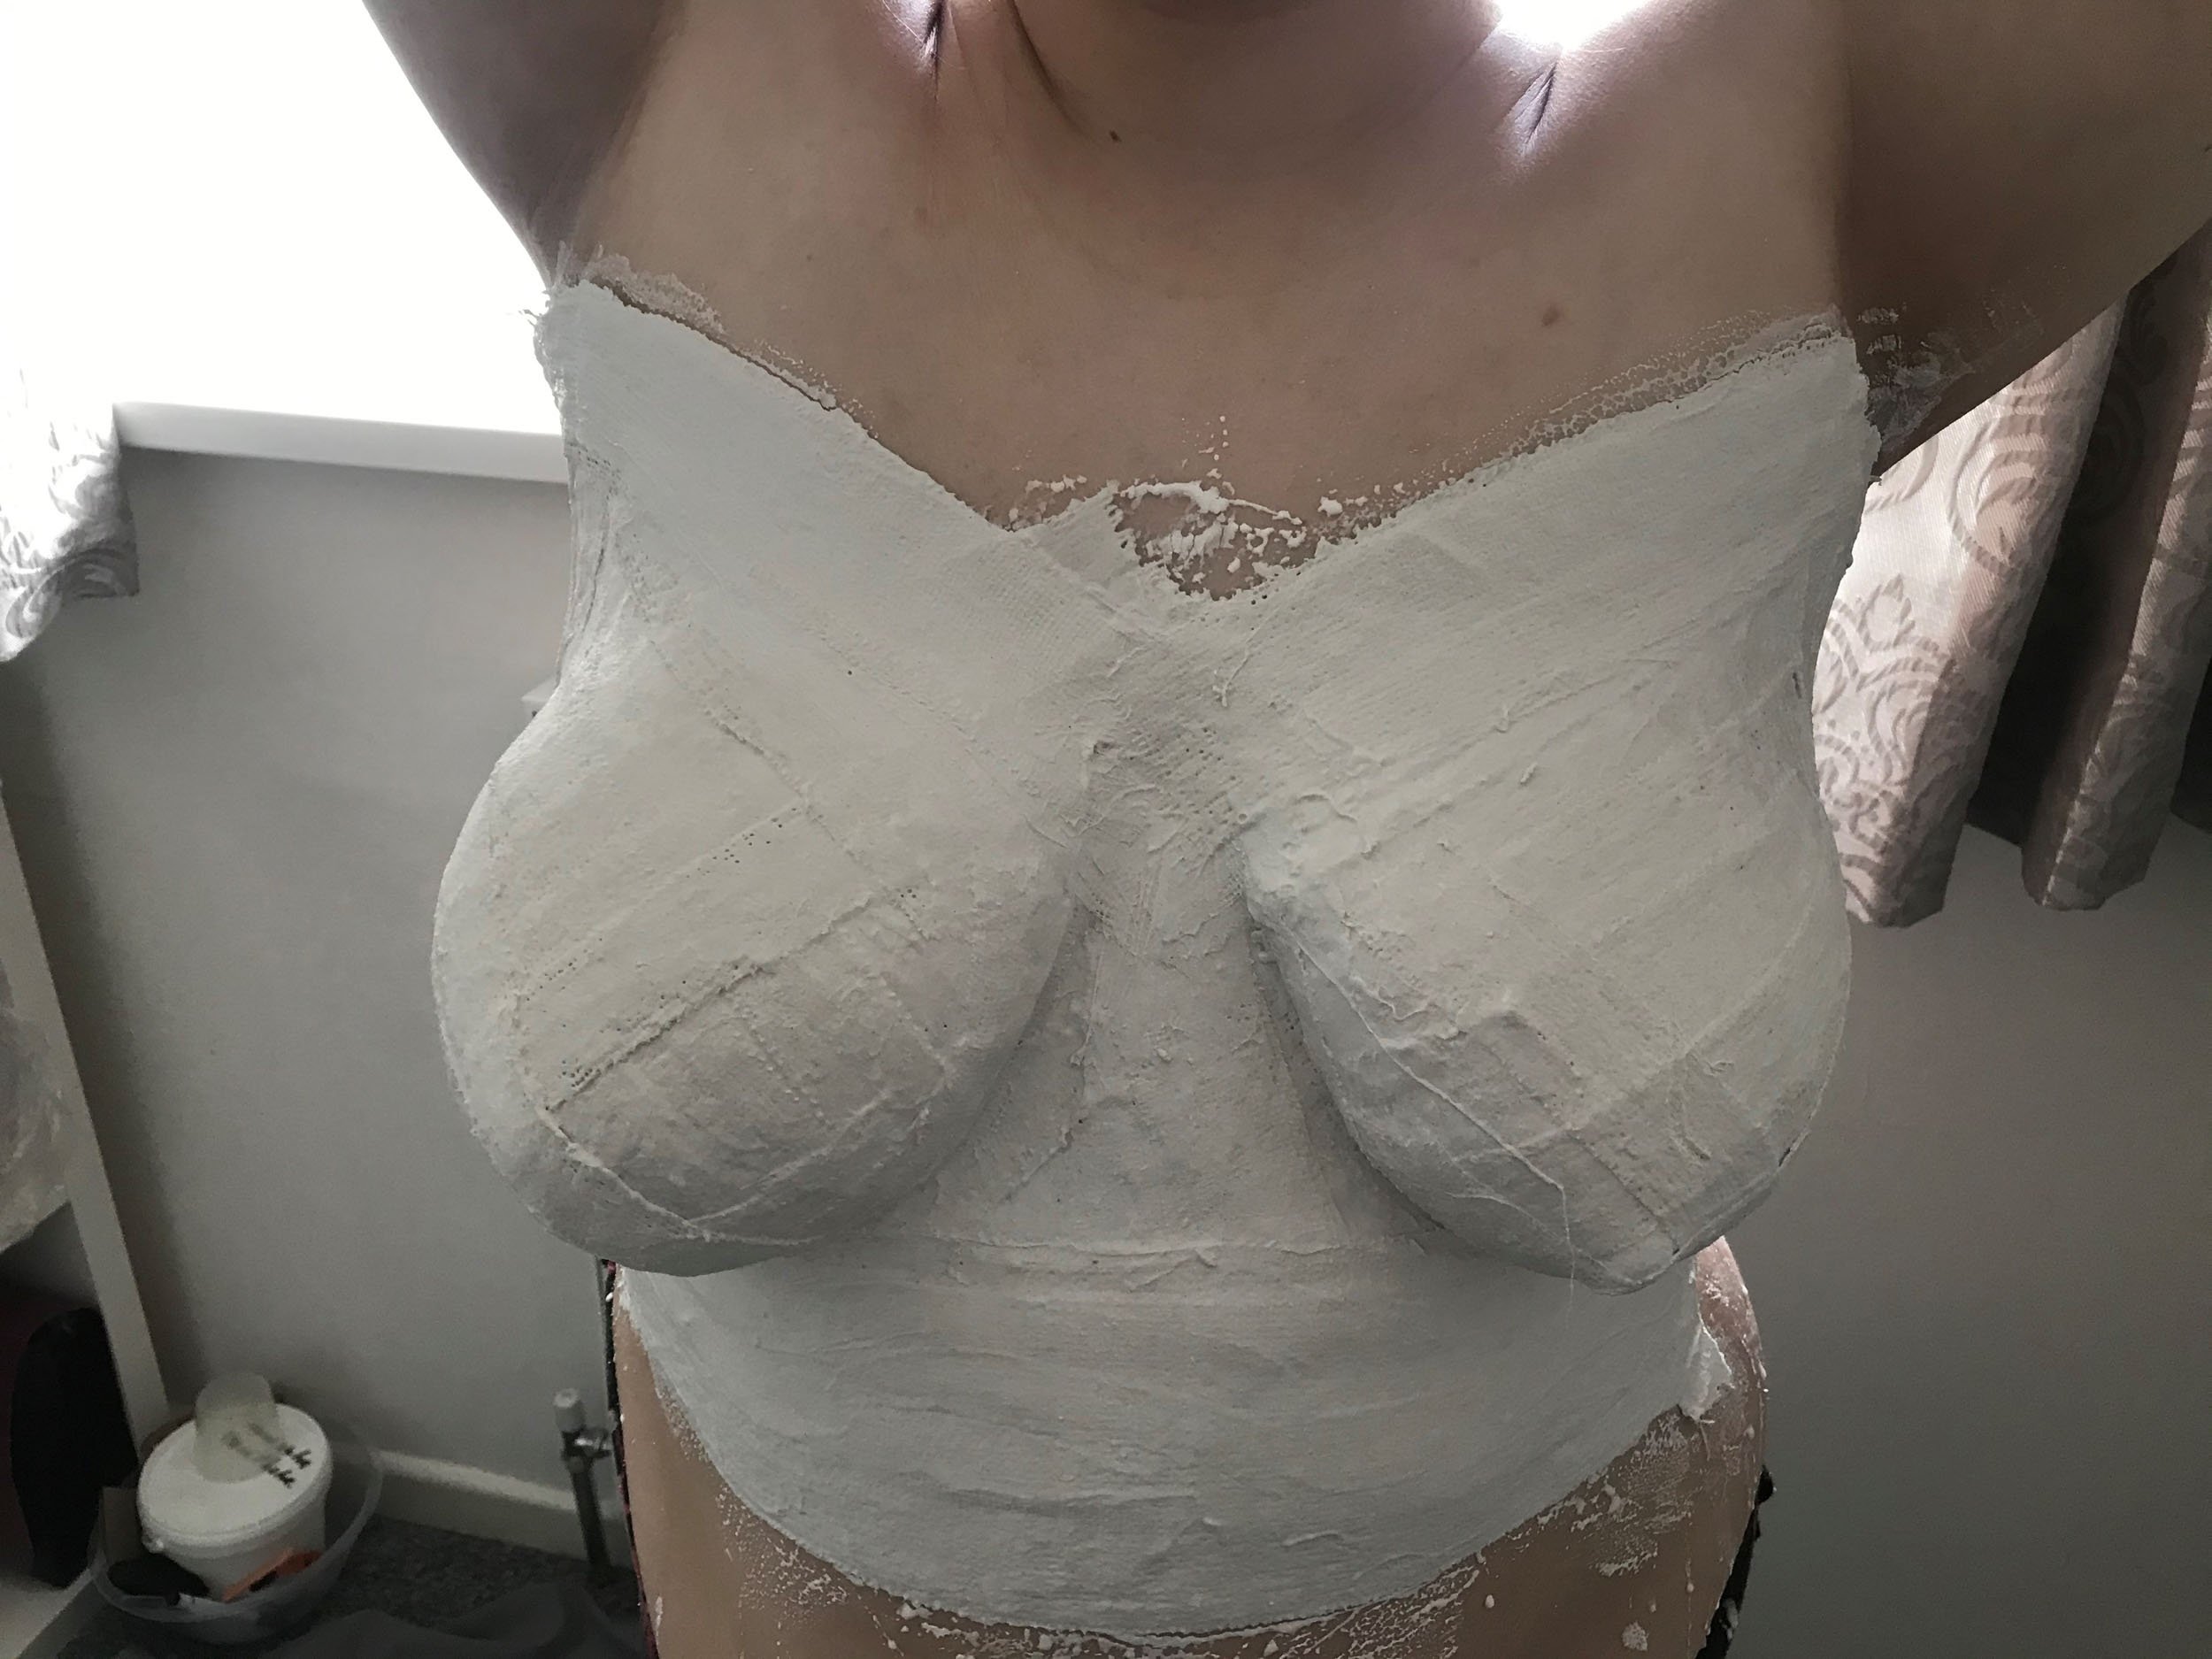
Cover your chest in petroleum jelly.
Cover your nipples in an X shape using the 2 x 5-inch strips.
Apply up to 3 layers of the plaster strips over each breast. DO NOT EXCEED 3 LAYERS AS IT WILL START TO BECOME DISTORTED.
Now apply the full-length strips (up to 3 layers).
Apply the strips so that they are in line with your armpits.
Allow at least 15 minutes for the cast to set.
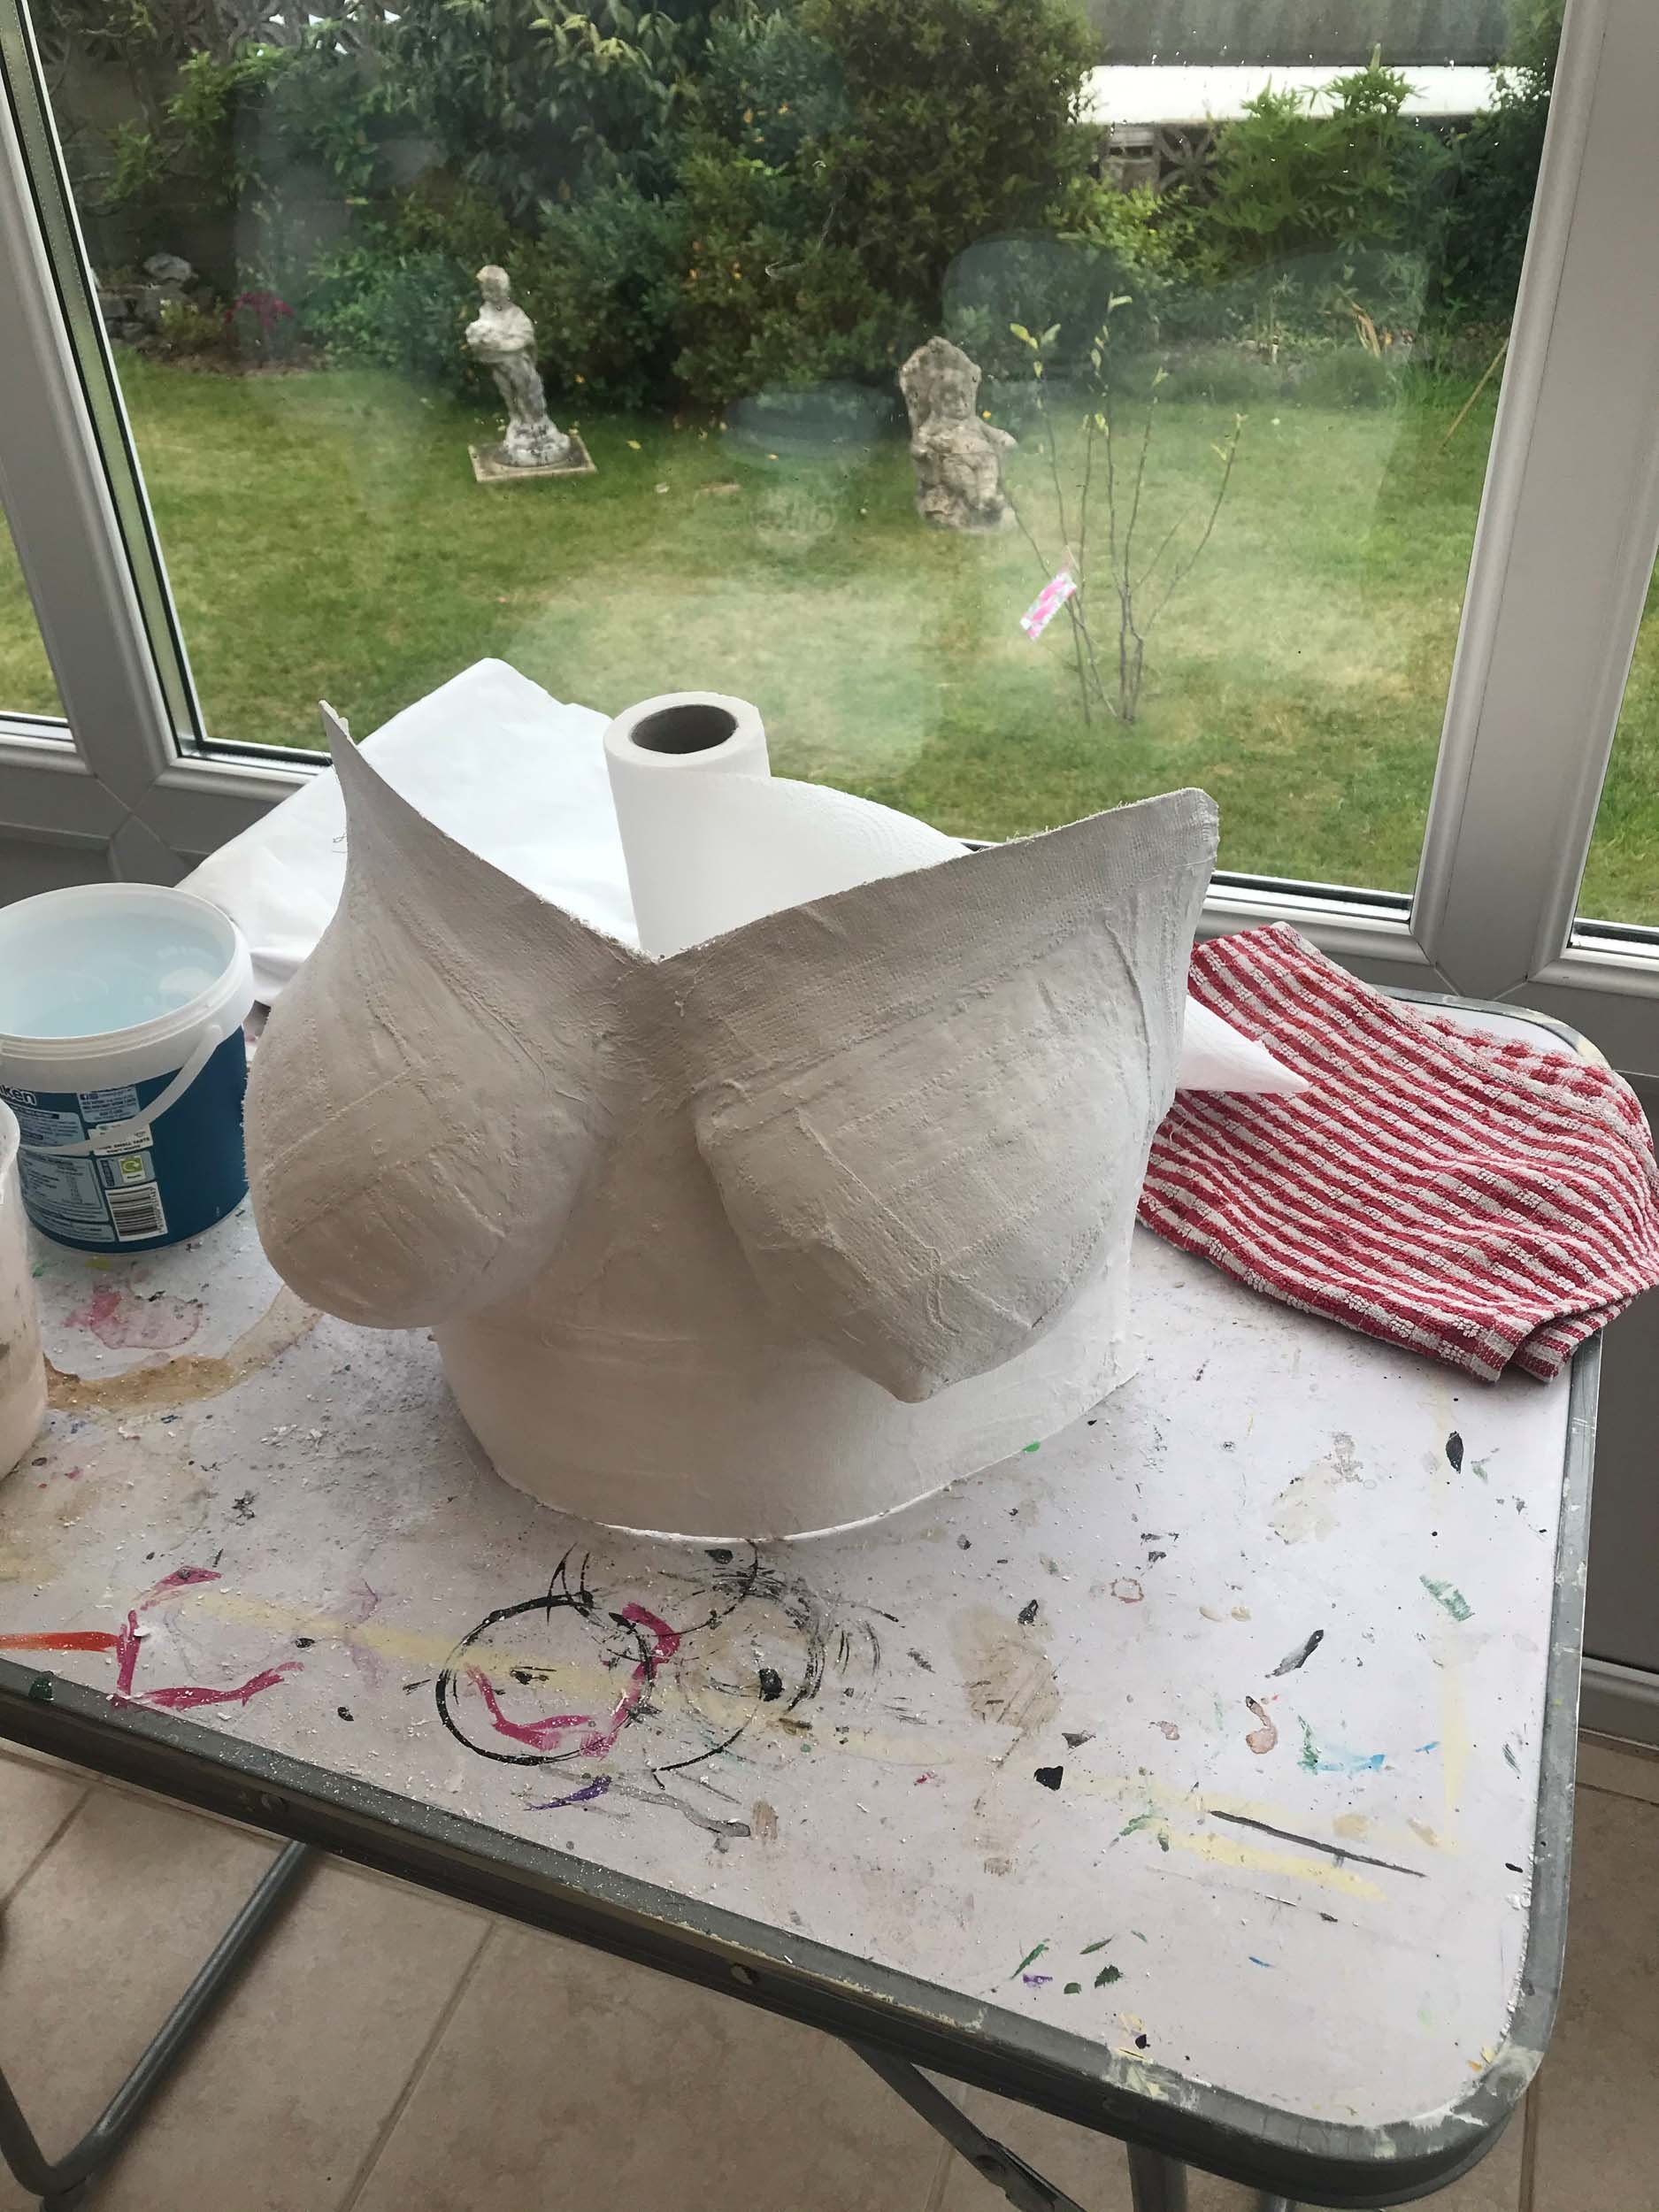
Gently wriggle away from your cast once it is set.
Place your cast on a tray and allow at least 48 hours for this to dry. (We would recommend using an airing cupboard for this stage or a warm area where your cast won’t be disturbed.

Stage 2
Once the cast is dry, cut your cast to create your desired shape.
Fill in any gaps with the plaster of Paris. Make sure your plaster mixture is runny (like a cake mixture) and apply your plaster with a small paintbrush.
Note:
After 24 hrs, if the edges on your cast appear weak, add a thin layer of plaster moulding strips around the edges. Coat the cast once again with a thin layer of plaster of Paris and allow to dry.
Top tip
Plaster of Paris sets quickly, have an extra jug of water to hand and keep adding to your plaster mixture to ensure a thin consistency throughout.
Once your cast is dry and hole free, it’s time to gently sand it. Again, please take your time to perfect a smooth finish.

Your beautiful cast should now be ready for its final stages of being painted, decorated, and varnished.
We hope you enjoyed making your breast cast. If you would like to donate to The Primrose Foundation for providing these instructions, please click on the link below. Thank you.